Installing a Strain Gauge
Recently in lab for my Mechanics of Solids class, our professor decided we should all know how to put a strain gauge on aluminum in case we ever need to use one for research or in our professional lives. A strain gauge works by measuring the change in resistance due to the deformation of a small circuit. When the area under the gauge is in compression the resistance lowers, and it increases in tension. Fascinating, I know.
My professor required our final strains to differ by a max of 2% from the theoretical calculations, which is a reasonably high standard for a few college kids who have no idea what they're doing.
Preparing The Aluminum
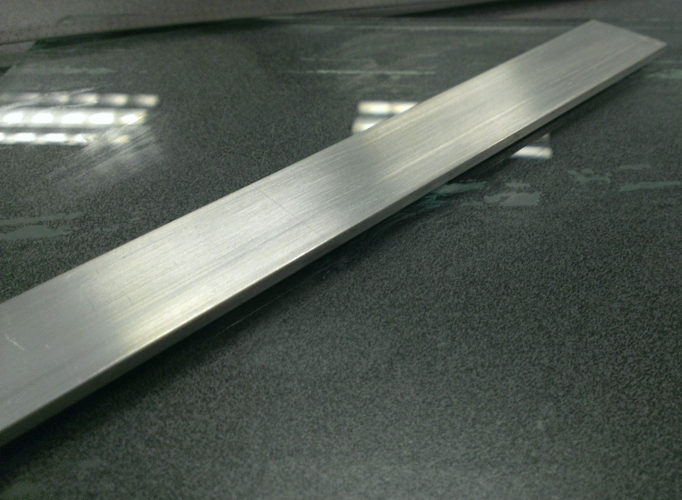
Before doing anything, I had to prepare the aluminum. Anybody who's taking some chemistry probably remembers that Aluminum oxidizes. Apparently, to apply a strain gauge you have to apply it directly to the aluminum itself without the oxidized layer on top. I neutralized the blade, applied a mild acid and rubbed it with sandpaper. It was very important that all solutions be within their expiration dates.

In between steps, we all used about 45 sheets of gauze to wipe off bar. It was a pain.
Installing The Gauge
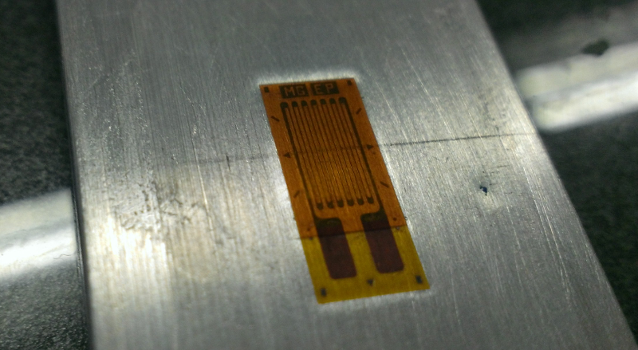
Installing the gauge is a process that requires "detail-oriented" work. To begin, quoting from class, "remove the strain gauge using the butterfly technique". After doing whatever that was, I picked up the strain gauge using a piece of tape, and then set it up so the two arrows fell next to the lines. After they lined up, I folded it back on itself.
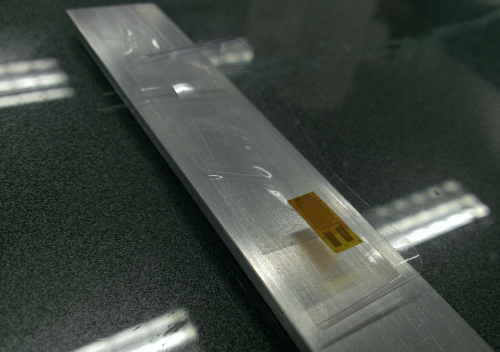
Our professor then applied glue for us, as this is truly a challenging part of the process apparently, and then we smoothed it over and firmly pressed with our thumbs. Overall, the whole process went smoothly after two attempts and I ended up with this.
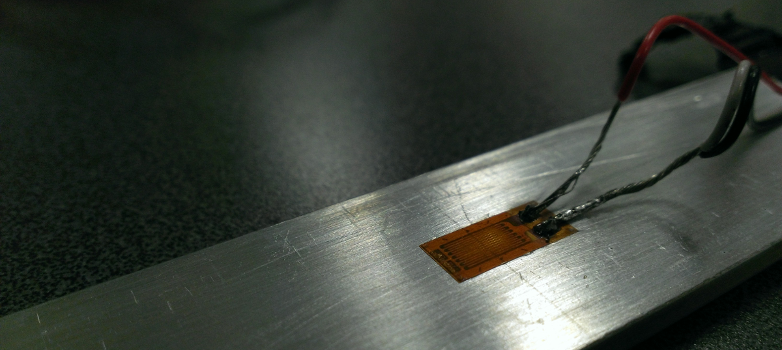
The final step was to solder on the wire so the strain gauge could actually be attached to a meter. This required precision instruments, and solder mostly made of tin. We tinned the end of the wires, and then applied a small amount of solder to attach the wires to the two different plates. In the end, it turned out to have a 1.6% error, which is below the requirement.
More importantly, did I learn stuff? Well I already know how to follow directions and how to solder, so it was more that I practiced those skills as opposed to learning new things. It's still cool to have a real product at the end of lab for once though.